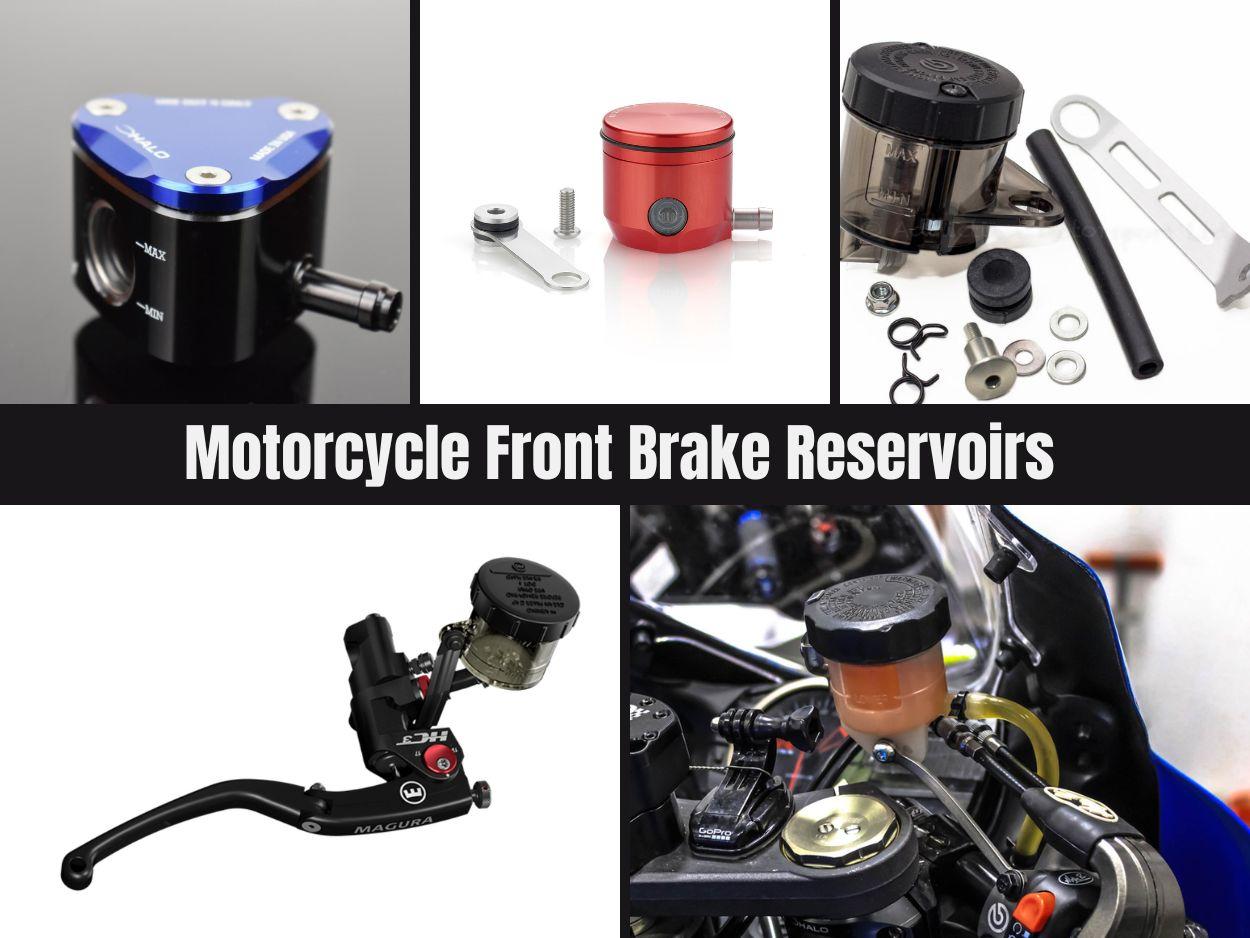
How to Choose a Motorcycle Front Brake Fluid Reservoir
Here is a comprehensive look at something we riders don’t usually pay too much attention to. However, your front brake reservoir is a critical part of your bike and if you need to replace or upgrade you should get all of the information you need to pick the right reservoir. Hopefully, this blog will help you figure it out.
Why Upgrade Your Motorcycle’s Front Brake Reservoir
There are two primary reasons to consider upgrading your front brake reservoir:
You want something that looks better than OEM - There's nothing wrong with adding some bling and personalizing your bike. It's satisfying when your bike looks the way you want it to.
You just upgraded your stock master cylinder - So, you’re getting your personal MotoGP on and want to be able to work on your trail braking. Now you need to figure out how to get a reservoir mounted and connected to the new master cylinder.
Mechanically, changing your brake reservoir is relatively easy, but there are several factors to consider:
- Types of Brake Reservoirs - This includes size, material (metal or plastic), fluid exit location, fluid compatibility, and more.
- Reservoir Mounting Points - Does the reservoir mount to the connecting bracket on the side or on the bottom?
- Motorcycle Mounting Points - Will you mount the new reservoir on the master cylinder itself, on the clamp holding the master cylinder, on the triple clamp, or on the mirror mount?
- Mounting Brackets - The bracket you need depends on your chosen motorcycle mounting point, the reservoir mounting point, and clearance requirements.
- Type of Fluid Hose - Clear tubing or opaque?
Types of Front Brake Reservoirs
There are various types of brake reservoirs to suit different functional and aesthetic preferences. Aside from your preferred aesthetics, here are the factors to consider when selecting a new reservoir:
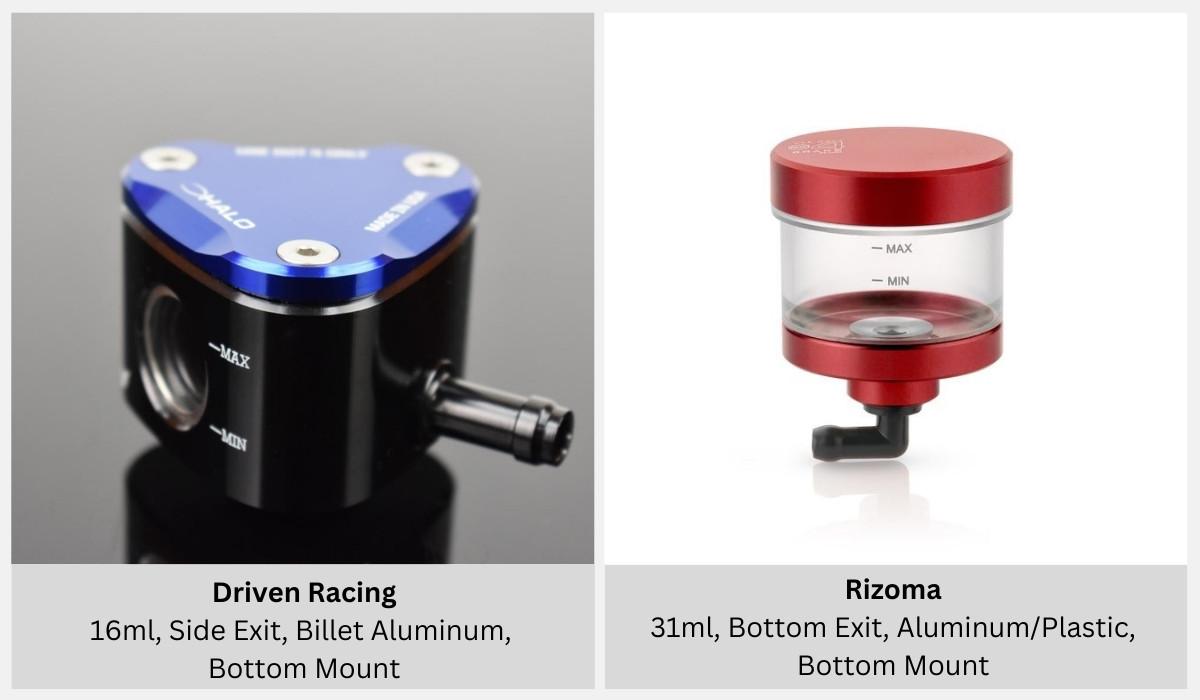
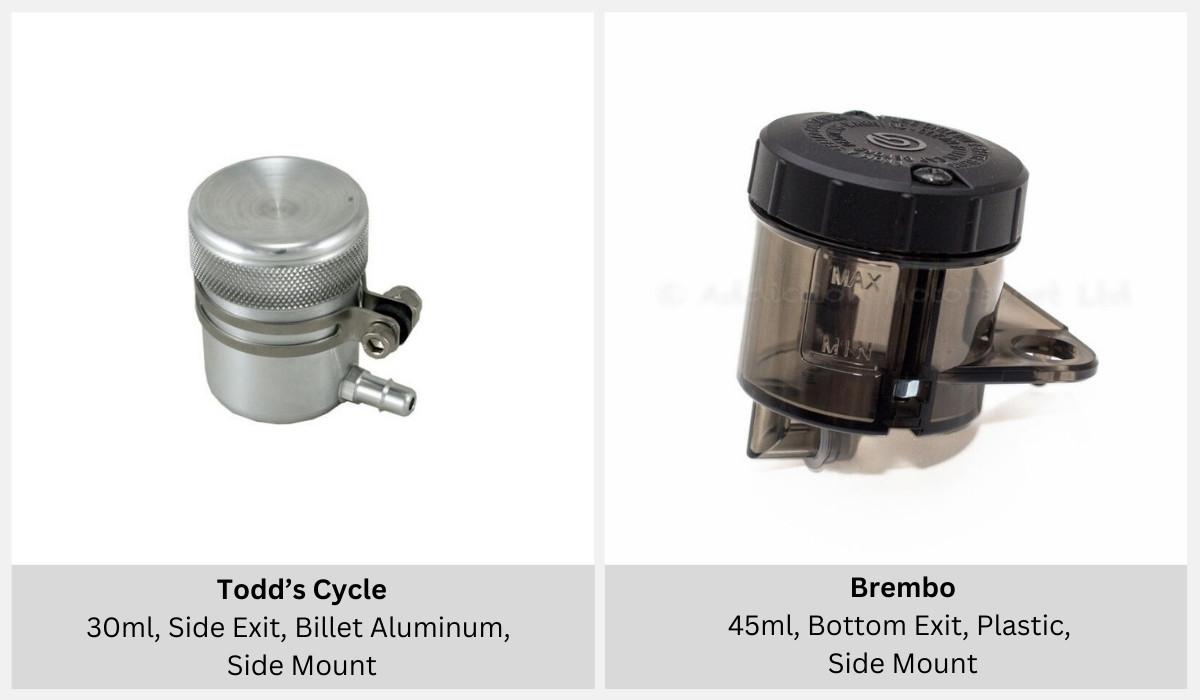
Size - Motorcycle front brake reservoirs typically range in size from 9ml to 45ml. The primary purpose of the reservoir is to accommodate varying fluid volumes during braking. As brake pads wear, more fluid is needed in the calipers because the pads become thinner. For racing applications where brake pads are frequently changed, reservoirs of 9ml to 20ml are common. On the street, where brake pads are changed less frequently, 25ml to 45ml reservoirs are used.
Fluid Exit - Motorcycle front brake reservoirs have fluid connections on the side or bottom. Bottom exit reservoirs generally mount slightly higher, as the exit should always be above the connection on the master cylinder to allow air bubbles to flow upward into the reservoir. Regardless of exit type, always make sure the reservoir has enough fluid to prevent air from entering the braking system during leans. This means that when the bike is leaned over, there should be fluid covering the exit hole. As you mount the reservoir, consider the direction of the exit such that when the bike is leaned the exit is not starved of fluid.
Material - Fancy motorcycle brake reservoirs are either made from billet aluminum or brake fluid-safe plastic. Aluminum reservoirs are typically more expensive, heavier, and offer a sleek appearance, while plastic reservoirs are more budget-friendly and lightweight. If you anticipate using a thin bracket for mounting, a lighter plastic reservoir might be the better choice.
Fluid Compatibility - Most reservoirs are compatible with DOT 4 and DOT 5 brake fluid, but always verify compatibility with the brake fluid used in your bike before making a purchase.
Reservoir Mounting Point - Brake fluid reservoirs connect to the mounting bracket from either the bottom or the side. The chosen reservoir mounting point, in conjunction with the motorcycle mounting point, will determine the type of bracket that you will need.
Examples of Different Types of Motorcycle Brake Reservoirs:
Types of Motorcycle Mounting Points
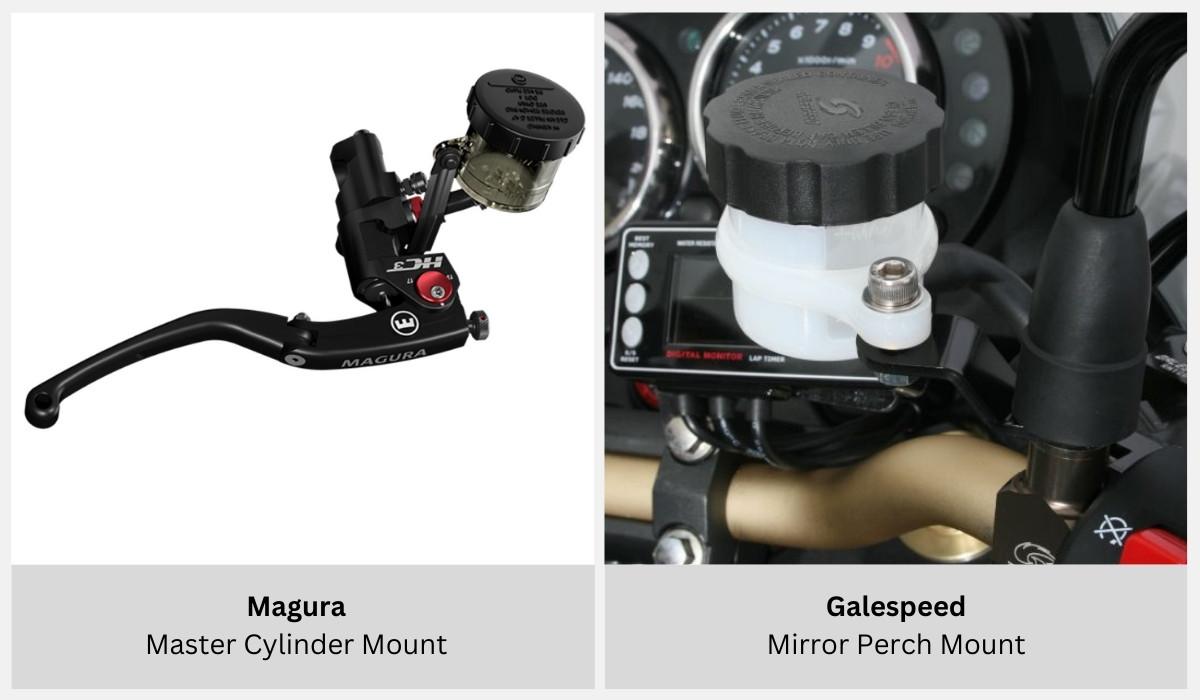
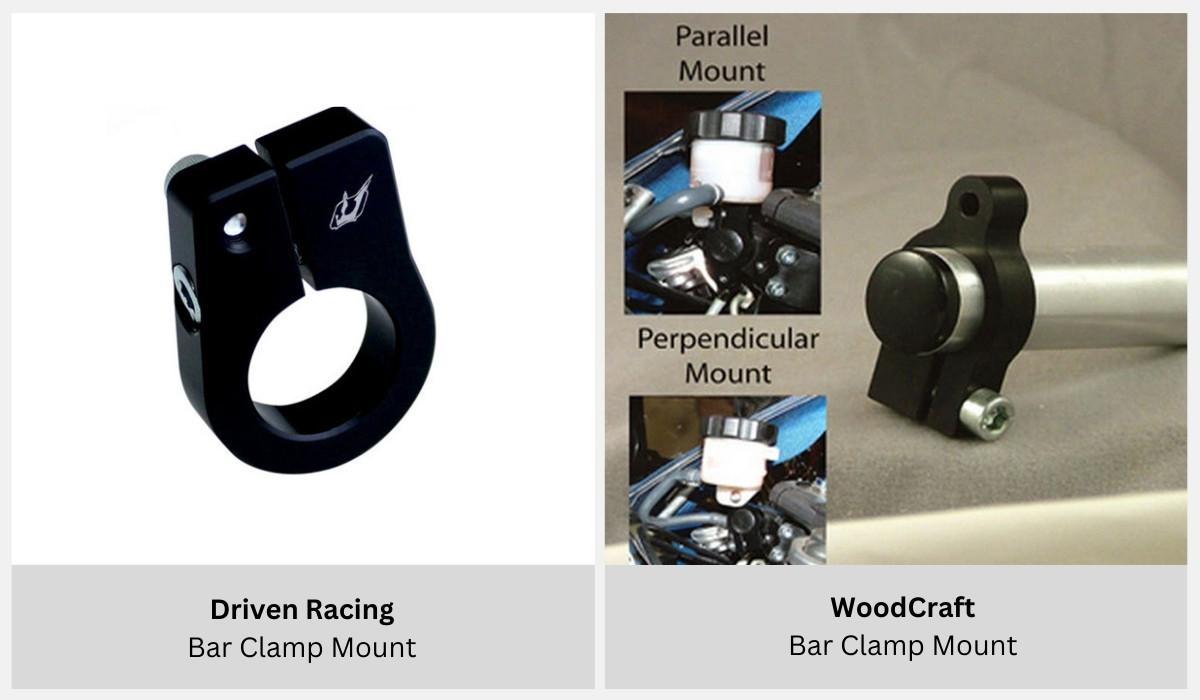
There are typically four ways to connect a mounting bracket to your master cylinder:
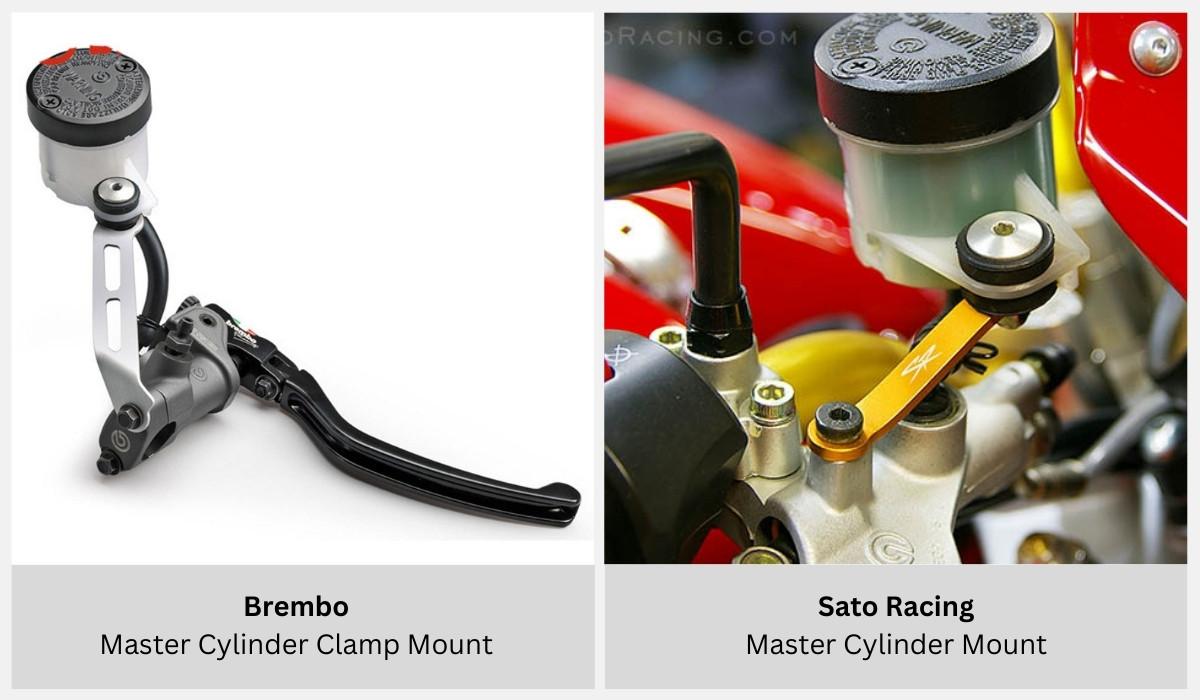
Direct on Master Cylinder - Most aftermarket master cylinders provide a provision for connecting a mounting bracket via a small bolt hole.
Master Cylinder Clamp Mount - You can attach the mounting bracket to the topmost screw on the clamp that secures the master cylinder to the bar.
Bar Clamp Mount - If you have space on your bars, left of the master cylinder, you can attach a clamp specifically designed for securing a reservoir. Sometimes, you can connect the reservoir to the clamp without an additional mounting bracket.
Mirror Mount - If you have bar-mounted mirrors or can obtain an alternative master cylinder clamp with a provision for a mirror post, you can mount a bracket between the mirror and the mirror post.
Examples of Different Motorcycle Mounting Points:
Mounting Brackets
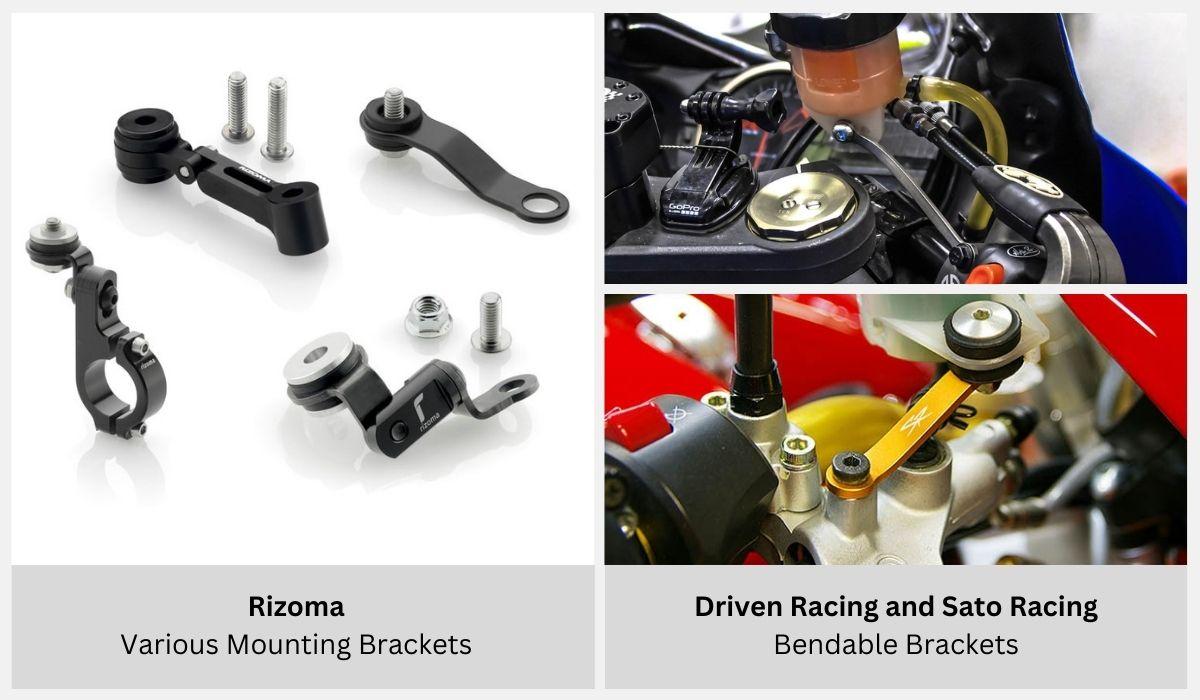
There are various options for mounting brackets, and the bracket you need depends on the reservoir mounting point, motorcycle mounting point, and the desired reservoir placement relative to the master cylinder. Most mounting brackets come in fixed shapes, but some have multiple adjustable joints or can be bent to fit your needs.
Master Cylinder Mount Bracket - This bracket connects to a dedicated bolt hole on the master cylinder body.
Mirror Mount Bracket - Mirror mount brackets connect to the mirror mount perch bolt hole.
Clamp Mount Bracket - Clamp mount brackets connect either via a dedicated clamp for the reservoir or via the master cylinder clamp bolt.
Examples of Mounting Brackets:
Tubing
The final piece of the puzzle is deciding on the internal diameter and color of tubing you need:
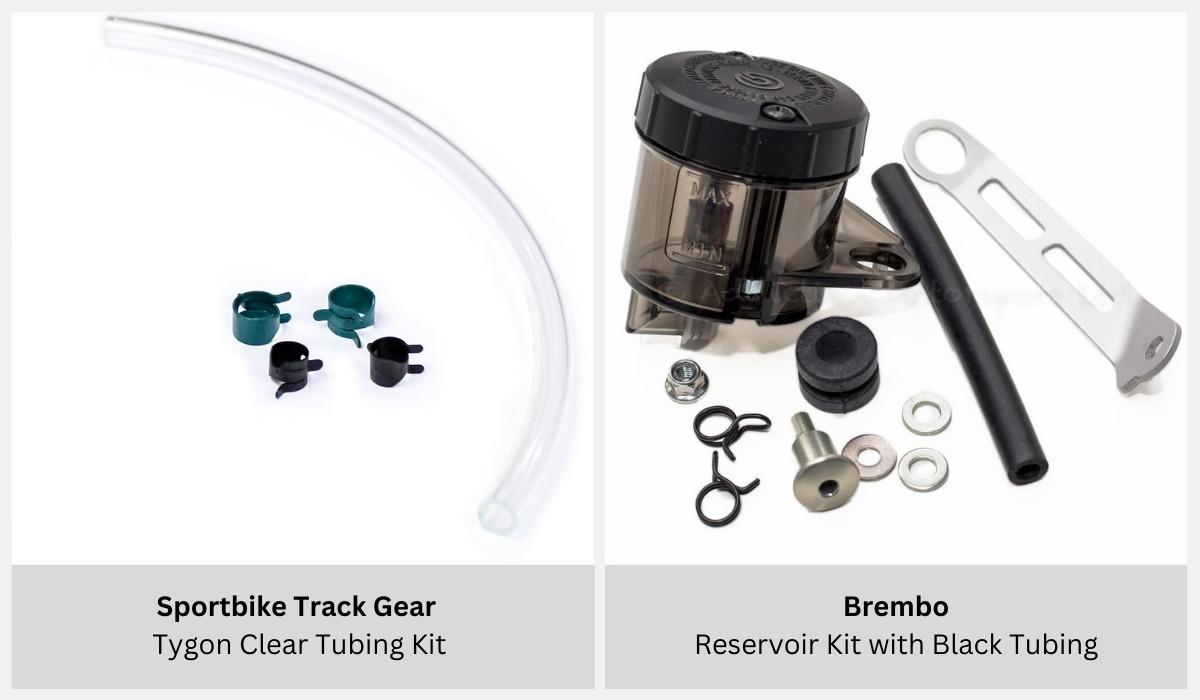
Internal Diameter - This is usually 6mm or 8mm ID. Use the smallest diameter tubing possible for the fluid nipples on the master cylinder and reservoir exit. Aftermarket master cylinders typically use 6mm internal diameter tubing.
Color - Tubing comes in transparent or black colors. Black tubing prevents fluid degradation from sunlight exposure, while clear tubing allows you to monitor the color (indicating age) of the fluid, which tends to darken over time. If you change your fluid frequently, clear tubing is a good choice. For naked bikes with exposed cockpits, black tubing is the better choice. Regardless of your choice, ensure the tubing is compatible with brake fluid; Tygon tubing is considered the gold standard.
Brake Fluid Tubing Examples:
Happy Wrenching
So, that's all you need to know about motorcycle front brake reservoirs. You can now pick the one you think will work best with your master cylinder. After installing your new reservoir, t's a very good idea to bleed your front brakes to make sure no air is in the system. Good luck!
Products in this Blog
- Driven Racing Reservoir - 16ml
- Rizoma Pure Front Brake Reservoir
- Todd's Cycle Universal Brake Reservoir
- Brembo RCS Reservoir Kit
- Sportbike Track Gear Tygon Tubing Kit
- Driven Reservoir Bracket
- Driven Universal Reservoir Clamp
- WoodCraft Universal Reservoir Mount Bracket
- Rizoma Mounting Brackets
- Sato Universal Brackets
- GaleSpeed Tank Bracket
- Magura Master Cylinder